
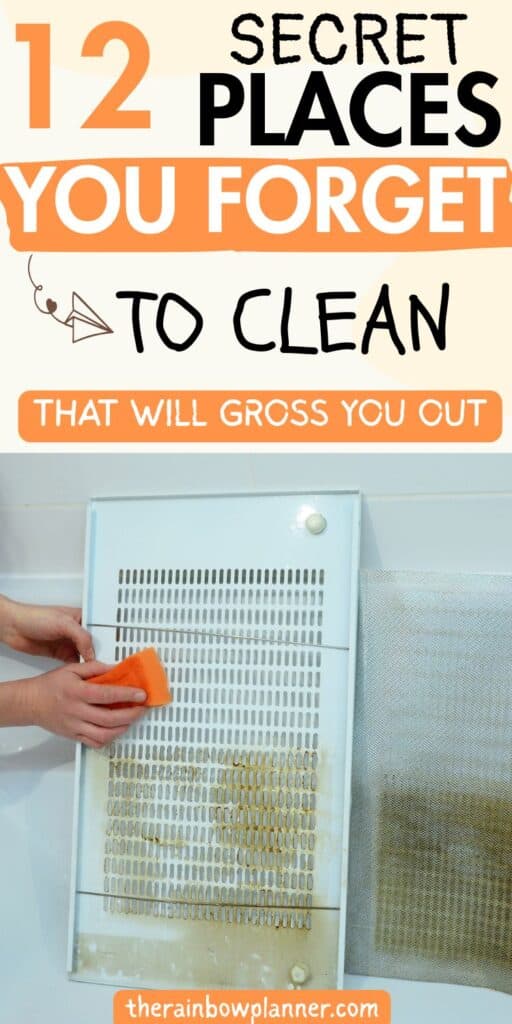
Even the cleanest homes have sneaky spots where dirt hides. With busy schedules, it’s easy to miss things you forget to clean in your house, but these overlooked areas matter more than most people think.
Tackling them helps create a healthier, fresher space you’ll enjoy living in.
This post covers the top spots most people miss, plus simple habits you can use alongside other expert cleaning tips to make every room shine.
1. Light Switches and Door Handles
Think about all the things you touch every day without even blinking.
Light switches and door handles are the silent gatekeepers in every room, collecting the invisible fingerprints of everyone who passes through.
These spots are magnets for germs, fingerprints, and grime, yet they often escape the weekly cleaning blitz.
If there’s one lesson in conquering things you forget to clean in your house, it’s that these little surfaces pack a serious punch for home hygiene.
How to Clean Them Without Fuss
Spray or wipe—either approach works as long as you do it often.
Use a disinfectant wipe, a microfiber cloth dampened with a mild cleaner, or even a DIY mix of peroxide with a drop of dish soap for a safe, streak-free shine.
Good cleaning habits also mean letting switches and handles dry fully, so they stay germ-free longer.
According to cleaning enthusiasts, hitting these surfaces at least once a week is smart for anyone trying to lower the spread of germs.
2. Remote Controls and Electronics
Remotes, game controllers, and tech gadgets often get left off the cleaning checklist.
These little devices might be some of the most used objects in our homes, but they are also magnets for bacteria, pet hair, dust, and sticky fingerprints.
For anyone focused on things you forget to clean in your house, this is a spot worth your attention.
Safe Ways to Clean and Sanitize Remotes
Harsh cleaners and too much moisture can damage electronics, so gentle methods matter.
Most people use a disinfectant wipe or a slightly damp microfiber cloth to tackle easy messes. For crevices, a cotton swab barely dipped in alcohol loosens stubborn dirt.
Avoid spraying anything directly on devices, and always let them dry before the next Netflix marathon.
3. Tops of Doors, Frames, and Cabinets
Take a quick tour around your home looking upward, and you’ll spot some of the most ignored dusty zones in any house.
The tops of doors, frames, and cabinets are prime examples of things you forget to clean in your house, simply because they’re out of sight and out of mind.
Dust, cobwebs, and even grease (especially in the kitchen) can settle here, quietly affecting both the cleanliness and air quality of your home.
Easy Steps to Clean Door Frames and Cabinet Tops
A simple method to clean these places is to use a microfiber cloth (ideally dry for dusting, or slightly damp for sticky build-up), and work from one end of the room to the other.
For greasy spots, like the tops of kitchen cabinets, a little dish soap on a cloth works wonders.
I recommend checking out this hands-on guide about the best way to clean greasy cabinets for detailed techniques.
4. Behind and Under Appliances
It’s tempting to ignore what’s hiding behind and underneath our big kitchen or laundry appliances.
After all, refrigerators, stoves, and washing machines are heavy and awkward to move.
But these spaces are notorious for trapping dust bunnies, crumbs, pet hair, and spills that lead to odors or even attract pests.
Missing these hidden areas is one of the most common things you forget to clean in your house.
Making the Job Easier and Safer
Dealing with heavy appliances can feel daunting. I suggest unplugging and pulling the item out just far enough to reach behind—no need to muscle out the whole fridge or stove every week.
Use a vacuum with a narrow attachment to clear out debris, then a damp mop for spots and spills.
How Often Should You Clean Behind and Under Appliances?
Once or twice a year is enough for most homes, but if you have pets or kids, tackling these spots more often helps keep the dirt under control.
Some suggest adding this deep clean to your seasonal or spring cleaning checklist.
Don’t Forget Under the Smaller Appliances
The toaster and microwave maybe don’t get moved as often as they should. Slide them out every month or so to wipe up crumbs and oily residue. A damp microfiber cloth works well for these quick jobs.
5. Baseboards and Vents
Baseboards and vents are two classic examples of things you forget to clean in your house.
At first glance, they might not seem urgent.
Unless you drop something or notice a layer of dust, these spots tend to gather dirt, hair, pet fur, and even hidden allergens without us noticing.
Giving them regular attention makes your home look fresher and keeps the air cleaner, especially during allergy seasons.
The Best Way to Clean Baseboards
I grab a microfiber cloth slightly dampened with warm, soapy water. For less stubborn grime, a dry cloth or dusting wand picks up most of the dirt.
For a deep clean, I check the cloth often and swap it out when it gets dirty to avoid smearing more dirt around.
If baseboards look dull after cleaning, a quick wipe with a dryer sheet can help repel future dust.
Vents and Return Grilles: Hidden Dirt and Air Quality
Vents hide dust and pollen that gets blown around every time the heater or AC kicks on.
Over time, this can lower the air quality in your space and blow dust back into freshly cleaned rooms.
I remove vent covers if possible and either vacuum inside or rinse them with warm water and a bit of soap if they’re really grimy.
For wall or ceiling vents, a quick run-over with a vacuum brush attachment works wonders.
How Often Should You Clean These Spots?
Adding vents and baseboards to a monthly cleaning run is usually enough to keep gunk at bay, but homes with pets or allergies may need more frequent attention.
Baseboards can piggyback on your regular floor-cleaning day, while vents often line up well with the change of each season.
6. Shower Curtains and Liners
Shower curtains and liners are top offenders on the list of things you forget to clean in your house.
These often-damp surfaces collect soap scum, mildew, and bacteria, especially on the lower edges where water pools and air can’t circulate.
If you notice a less-than-fresh scent in your bathroom, chances are your shower curtain is hiding the culprit.
Simple Steps to Keep Them Clean
I like to toss fabric curtains and most liners right in the washing machine with a bit of detergent and several old towels for gentle scrubbing power.
For plastic curtains, washing on a gentle cycle or soaking in the tub with warm, soapy water works wonders.
For tough mildew or stubborn spots, a splash of vinegar or a little bleach can help remove stains and odors, as outlined in this step-by-step guide to cleaning shower curtains and liners.
How Often to Wash Your Shower Curtain
A good rule of thumb is to wash your shower curtain and liner once a month, especially in a busy household.
If you see pink or black spots, don’t wait—tackle them before mold has a chance to spread. Rotating the liner every few months and letting it dry fully between showers makes a big difference.
Extra Tips for a Fresher Bathroom
- Always spread out the curtain after showering so it dries faster.
- Consider using a mildew-resistant liner to cut down on cleaning.
- Quickly spraying the liner with a mix of vinegar and water a few times a week helps prevent soap scum and bacteria.
- If space is tight, opt for a clear liner to make the bathroom feel more open; see more space-saving ideas for small homes.
7. Toilet Seat Hinges and Base
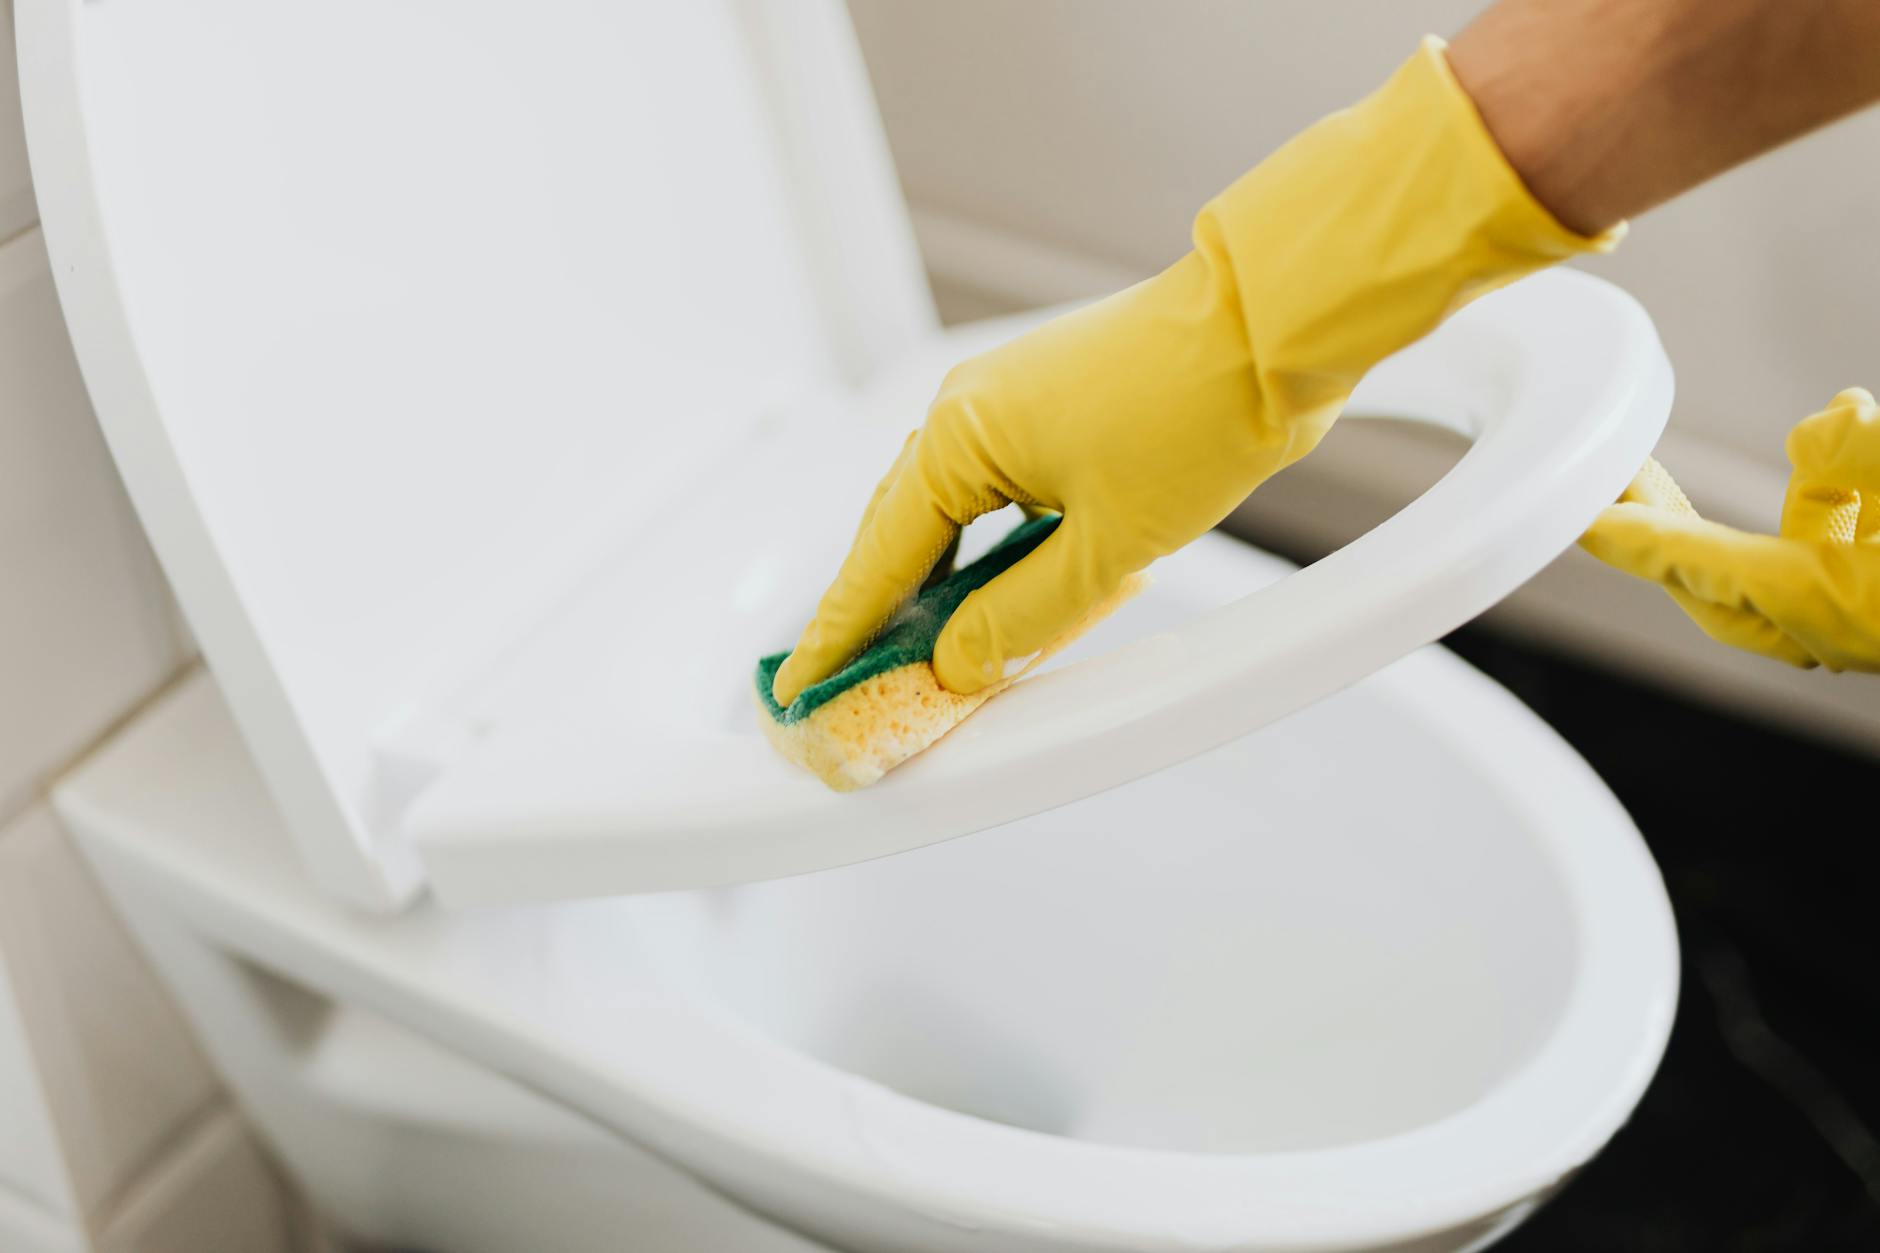 Photo by Kaboompics.com
Toilet seat hinges and the base are some of the sneakiest things you forget to clean in your house.
Many of us give the toilet bowl a quick scrub but skip those tight spots where the seat connects or the hard-to-reach edges of the floor.
That’s a mistake because grime, hair, and bacteria love to hide here, drawing unpleasant smells and, in some cases, spreading germs every time the toilet is used.
Paying attention to these details sets your bathroom apart from the average.
Quick Steps to Clean Hinges and the Seat Base
To clean these areas, start by popping off the seat if it’s removable. Spray a disinfectant around the hinges and let it sit for a minute to loosen the gunk.
An old toothbrush works perfectly for scrubbing the small gaps. I wipe everything down with a damp cloth, then use another clean, dry one to remove moisture and keep rust from growing.
Don’t Ignore the Base and Floor
The floor and base are just as easy to overlook, especially around the bolts at the back where the toilet meets the ground.
Wipe around the base weekly with an all-purpose cleaner. Use a brush for stubborn spots and check behind the toilet for dust balls.
Dirt in these spots can quickly make the whole bathroom smell off no matter how clean the rest of the space looks.
How Often to Tackle It
Add toilet seat hinges and the base to your weekly bathroom routine for best results. If you see gunk, don’t wait; frequent cleaning keeps germs down and your restroom smelling fresh.
Taking a few minutes now saves you from deep scrubbing later on.
Smart Tips for a Lasting Clean Toilet
- Keep a stash of disinfectant wipes in the bathroom for quick touch-ups.
- Choose a brush or cleaning tool just for these tight toilet areas to prevent cross-contamination.
- For stubborn grime, a gentle window or alcohol-based cleaner works well.
- Air out the bathroom after cleaning so moisture dries and mildew stays away.
- While you’re at it, double-check nearby surfaces for other things to throw away to declutter, like empty bottles or old cleaners.
8. Reusable Shopping Bags
 Photo by cottonbro studio
I love using reusable shopping bags for groceries, produce, and farmer’s market finds, but they can be some of the sneakiest things you forget to clean in your house.
These bags handle raw produce, packages, and even leaky cartons, picking up everything from dirt and crumbs to spilled milk and bacteria.
If neglected, reusable bags end up spreading those germs to your clean counters and fresh groceries, making them an important stop on any serious cleaning routine.
How to Clean Your Reusable Bags
Washing reusable shopping bags is simple, and it keeps your weekly routine safer.
Many bags are machine washable—just toss them in on a gentle cycle with soap and cold water, then line dry to keep them in shape.
If your bags have a plastic or insulated lining, hand washing in warm, soapy water is best.
Washing methods and tips for different bag types can be found in this fabric care guide.
How Often Should You Wash Them?
Most people forget to clean their bags altogether, but I recommend washing them after every two or three uses, or immediately if something leaks or spills inside.
Bags used for carrying meat, produce, or dairy need more frequent cleaning to avoid transferring germs to other food.
Extra Tips for Keeping Them Fresh
- Assign certain bags for specific uses (like produce vs. packaged foods) to cut down on cross-contamination.
- Always let bags air out completely before storing them to prevent mold.
- Small stains or food spots? Spot clean quickly with soap and water so they don’t set in.
9. Trash Cans and Recycling Bins
Trash cans and recycling bins are some of the most ignored things you forget to clean in your house.
I know from experience that it’s all too easy to toss out your garbage or recyclables without thinking about what’s lurking at the bottom.
These bins collect spills, food bits, and sticky residue, and, over time, can start to smell or attract pests even if you use liners.
Why Trash and Recycling Bins Need Cleaning
Even with trash bags in place, liquids and crumbs often leak, especially with heavy use or quick tosses.
This creates a perfect hiding spot for bacteria and lingering odors. When bins are left unwashed, they can also harbor mold and attract gnats or fruit flies searching for leftovers.
If you notice unwanted bugs circling your kitchen, cleaning your bins might solve the problem.
There are practical tips to tackle indoor pests and keep bins fresh, like these effective indoor gnats remedies.
How to Clean Trash Cans and Recycling Bins
A deep clean every month or two goes a long way. I take mine outside and rinse thoroughly, then I use warm, soapy water and a scrub brush to scrub all sides and the bottom.
Pay special attention to the lid and rim, where grime builds up. After rinsing, I let them dry fully in the sun when possible, which helps kill germs and clear out lingering smells.
For stubborn spots, sprinkle baking soda in the bottom and let it sit before washing out.
For simple messes on handles or lids that occur throughout the week, I usually take disinfecting wipes and give my bin a good wipe down.
When to Replace Trash Bins
If you notice deep cracks, cracks, or lingering smells that don’t go away after cleaning, it’s probably time for a replacement.
These are kinds of hidden issues that a lot of people miss—sometimes a smelly or sticky kitchen comes down to an old, worn-out bin rather than just normal trash.
10. Under Furniture Cushions
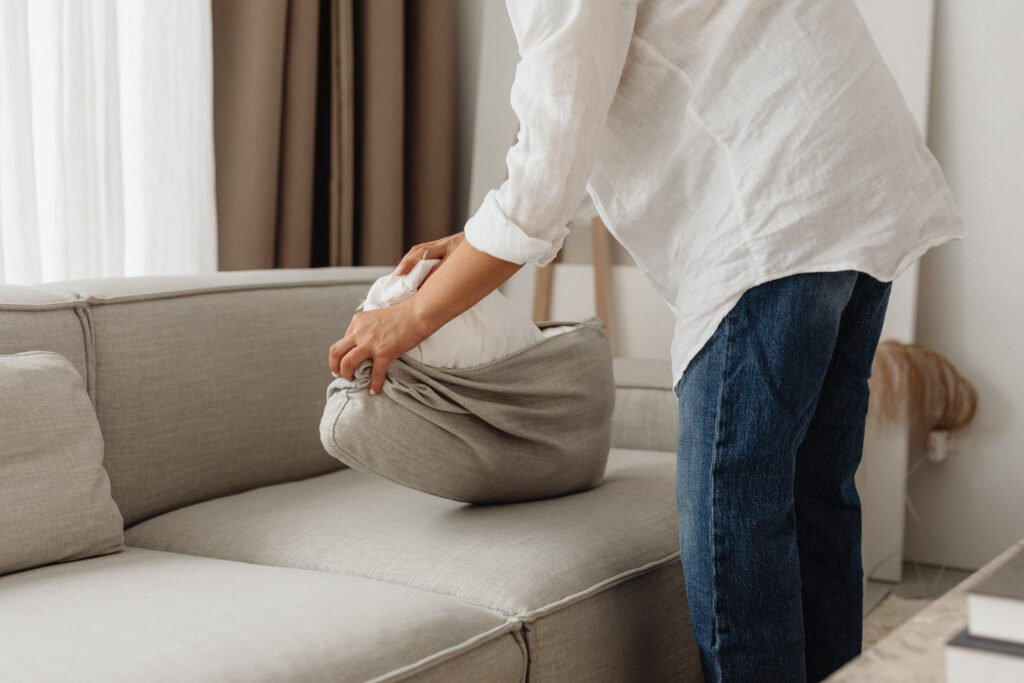
We all love sinking into our favorite chair or couch at the end of a long day, but the space right under those cozy cushions is a magnet for mess.
When it comes to things you forget to clean in your house, the area beneath the sofa and chair cushions might be the most surprising on the list.
Pet hair, popcorn kernels, coins, crumbs, and the odd remote can easily pile up out of sight, making this zone a hidden treasure trove for dust and allergens.
How to Clean Under Your Furniture Cushions
Cleaning here is easier than you think. Start by removing all the cushions and gathering up larger items like toys, coins, or lost remotes.
Next, use the hose attachment of your vacuum to suck up crumbs, hair, and dust that have worked their way deep into seams or fabric folds.
For fabric furniture, I sprinkle a bit of baking soda under the cushions, let it sit, and then vacuum again to help absorb odors before placing the cushions back.
Dealing with Spills or Stains Beneath the Cushions
If you find a sticky spill or spot under the cushions, blot right away to keep stains from setting.
For most fabrics, a bit of mild detergent mixed with water on a clean cloth will do the trick.
Allow everything to dry fully before putting the cushions back, so there’s no lingering moisture that causes musty smells.
See: How to make your living room cozy
Bonus Tip: Rotate and Fluff
While you’re cleaning under the cushions, give them a shake and a quick fluff.
Rotating couch cushions regularly helps them wear more evenly, supports your back better, and keeps your furniture feeling comfortable for longer.
11. Toothbrush Holders and Soap Dishes
Toothbrush holders and soap dishes are often left off even the best bathroom cleaning checklists.
They sit out in the open but still end up collecting layers of grime, toothpaste drips, soap residue, and even mold without us noticing.
For anyone who takes bathroom hygiene seriously, skipping these is like washing your hands but ignoring your fingernails.
Keeping these items clean keeps germs at bay and helps your sink area look polished all week.
Why Toothbrush Holders Need Special Attention
Toothbrush holders collect a surprising mix of old water, toothpaste drips, and bacteria.
Since the bottom rarely gets a chance to dry fully, gross, gunky buildup often appears out of sight.
I’ve found it makes a difference to tip out any standing water daily but, for true cleanliness, a deep scrub at least once a week is best.
Real-world advice on fighting this gross spot includes tricks like using a cotton pad at the bottom, and changing out on cleaning days, to catch extra drips.
How to Clean Toothbrush Holders and Soap Dishes Properly
A quick rinse isn’t enough for these tough, forgotten spots. Once a week, I empty the holder and wash it with hot, soapy water, giving extra attention to the bottom where slime tends to collect.
Using a bottle brush or old toothbrush gets into corners that a sponge can’t reach.
For added disinfecting, I’ll wipe the inside with rubbing alcohol after washing.
Quick Tips to Keep Bathroom Accessories Cleaner, Longer
- Let toothbrush holders and soap dishes air-dry between uses.
- Swap in a fresh cotton pad or paper towel at the bottom of holders every time you clean.
- Soak both items in diluted vinegar once a month to cut tough buildup naturally.
- Don’t overload the holder—too many brushes make it hard for everything to dry.
12. Ceiling Fans and Light Fixtures
 Photo by Curtis Adams
Ceiling fans and light fixtures often sit high above our heads, making them easy to ignore during the usual cleaning rush.
Yet these spots rank high as things you forget to clean in your house, quietly collecting dust, pet hair, pollen, and dead bugs.
Every time you flip the switch or turn on the fan, all that hidden grime can spread right back into the air and settle on your clean surfaces.
How to Clean Ceiling Fans Safely
To tackle fan blades, I use a microfiber duster or an old pillowcase to catch falling dust.
Gently wipe each blade from the center outward.
If they’re extra grimy, a little soapy water on a damp cloth breaks up sticky buildup.
Always turn off the power at the switch or breaker before cleaning to stay safe, especially if you need to use a sturdy ladder.
How Often Should You Do It?
Add fans and fixtures to your monthly checklist, or at least clean them with every change of season.
In rooms you use less often or where dust builds up faster, quick swipes every few weeks cut down on heavy buildup.
Regular cleaning helps lights shine brighter and air move freely.
Final Thoughts on Places You Forget To Clean
After tackling the places you forget to clean in your house, you may notice how small details can truly shift the feeling of your space.
Making time for these hidden spots doesn’t require loads of extra effort, just a bit more awareness and the right habits.
For more practical ideas that help keep clutter at bay as you clean, you might also want to understand the signs you might be a hoarder and spot patterns early.